
Static websites, comprising web pages that do not respond to any user input, may be adequate for listing information, but little else. Dynamic pages are what make the Web more than just interlinked digital billboards. The primary mechanism that enables this is the humble web form – whether a modest single button or a multi-page form with various controls that allow the user to input text, make choices, upload files, etc.
Anyone developing a new Drupal-based website will usually need to create forms for gathering data from users. There are at least two possible approaches to solving this problem: One approach mostly relies on Drupal core, and the other uses a contributed module dedicated to forms.
The Node Knows
If you understand how to create content types and attach fields to them, then that could be a straightforward way to make a form – not for creating nodes to be used later for other purposes, but solely for gathering user input. To add different types of form fields to a content type, you will need to install and enable the corresponding modules, all of which are available from Drupal.org's modules section.
Some of these modules are part of Drupal's core: File (for uploading files), List (for selection lists), Number (for integers, decimals, and floats), Options (for selection controls, checkboxes, and radio buttons), Taxonomy (for tagging content with terms), and Text (for single- and multi-line entry fields).
Other field-related modules have been contributed by the Drupal community, including:
To illustrate the use of many of these field types, imagine you want a website to serve as a worldwide directory of music concerts. It would need a form so event organizers can register. Fields could be given default values (e.g., “United States”), prefixes, and suffixes. Simply install and enable the relevant field modules; define a new content type, “Concert”; and add the relevant fields.
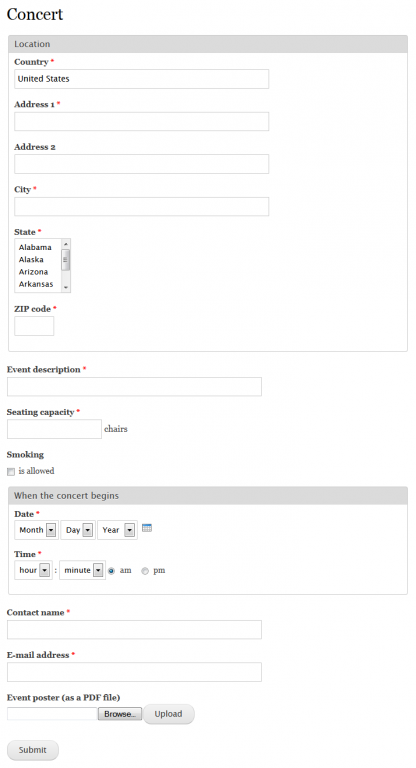
Figure 1. Concert registration form
Visitors would be directed to the path /node/add/concert, to post a concert. But to make the form available for use, you must first sign in as an administrator, and go to the permissions page (People > Permissions). In the Node section, enable the permission “Concert: Create new content” for anonymous users. Optionally, if you want registrants to be able to later modify their own entries, enable “Concert: Edit own content”.
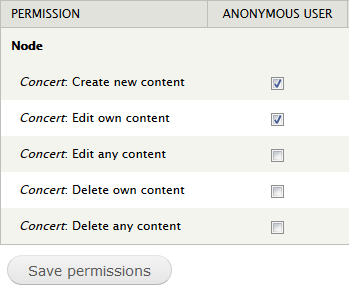
Figure 2. Content permissions
How can we later access the information submitted by the concert organizers? Individual events could be examined in the content admin area. Multiple events could be displayed using the Views project. You would need other modules to export the data, be notified by e-mail of new registrations, and other commonly-desired functionality.
The Wisdom of Webform
Form builders and administrators typically need these more advanced features. The canonical solution is the Webform project, which has a lot to offer: You can add form functionality to any node content type. Form submissions can be viewed, downloaded, or exported to spreadsheet programs such as Microsoft Excel. Webform can even export only those not yet exported, and by user. You can clone existing forms. You can set up e-mail notification of any form submission, and have the results e-mailed to you and/or the individual who completed the form.
To use Webform, begin by downloading, installing, and enabling it. Then visit its configuration page (Configuration > Content authoring > Webform settings), where you can specify which content types can have forms attached to them. In a minimal Drupal installation – which initially has no content types – the only one listed will be “Webform”. You can specify what types of fields (components) can be used within the form content types.

Figure 3. Webform settings for components
Resuming our concert registration example, create a new content type (without adding any fields to it), enable it for Webform, and create an instance of the content type. It will appear on the content admin page, just like a regular node. Editing it, we find two additional tabs, “Webform” and “Results”.
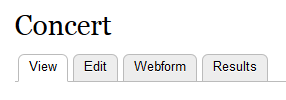
Figure 4. Webform node tabs
The form field types used in our first solution are not available for webforms, which have their own components, including the built-in ones we saw earlier on the Webform settings page. To use additional components, install and enable the corresponding contributed modules, of which there are many. Let's utilize two of them – Webform Phone Number and Webform Postal Code, as well as the two modules they depend upon – to build a Webform version of the concert registration page.
Edit the Webform concert node, and go to its “Webform” tab, whose page is divided into three sections: “Form components”, “E-mails”, and “Forms settings”.
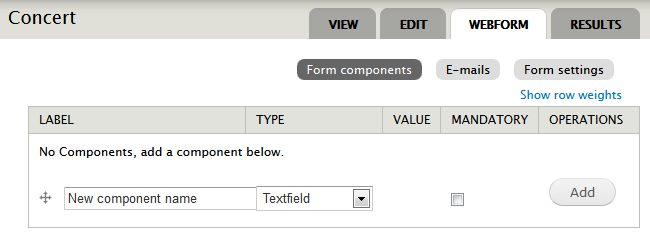
Figure 5. Webform tab
In that first section, add the fields for the registration form. Different component types naturally support different settings. For instance, the commonly-used “Textfield” component allows one to specify a default value, prefix, suffix, and other settings. Fields can be grouped into fieldsets, e.g., “Location”. To test the form, go to the “Results” tab, and click the “View this form” link.
Figure 6. Webform concert registration form
As before, set permissions so visitors to the website can access the new form.
In addition to the wide range of available component types, you can explore the other features of the Webform project, such as exporting and e-mailing form submission results. Global configuration for those are performed on the settings page we saw earlier.
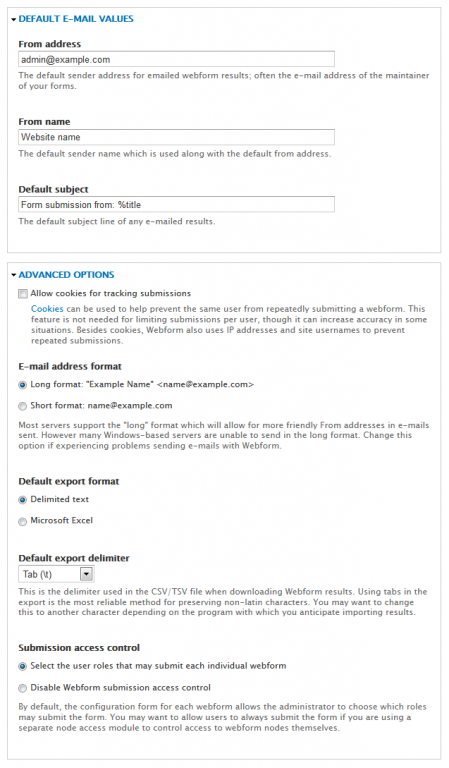
Figure 7. Webform settings for e-mail, etc
Form-specific settings are made in the Webform node itself, on its “Webform” tab, in the “E-mails” section.
Regardless of which of the two strategies you adopt, you should find that Drupal well supports the development of capable forms.
Image: ©Istockphoto.com/ulimi